
By now you should have done all the legwork; created your business manager & ad account and set up a pixel. With this out the way, you're ready to create your first Facebook campaign.
In this article, we're going to look at ways to create a simple but powerful prospecting campaign. By prospecting, we mean that we're going to be targeting new potential customers, rather than people who have already engaged with your brand. This latter form of targeting is called retargeting (you can find ideas on how to build a retargeting campaign here).
Creating the campaign#
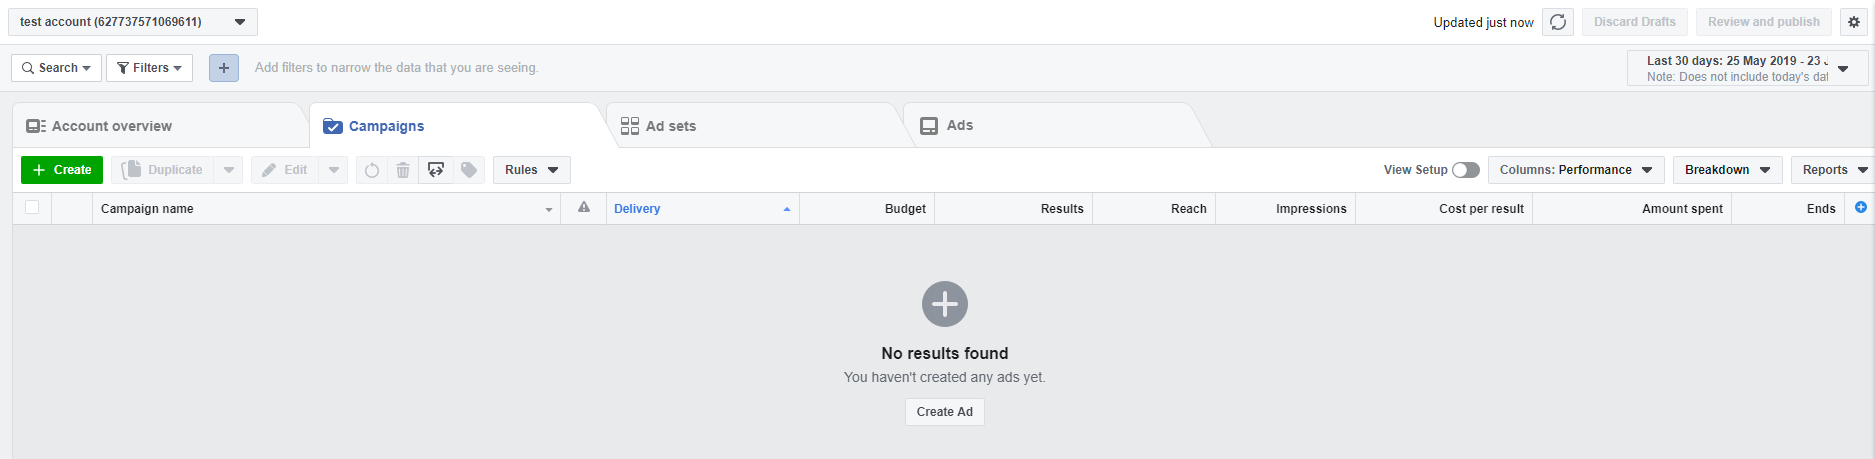
To create the campaign, we're going to first navigate to Facebook Ads Manager. If you've never used Ads Manager before, you'll see an empty screen like the one below:
To get started, we're going to click on the green 'Create' button in the top left. This will take you to another screen which lets you choose your campaign objective:
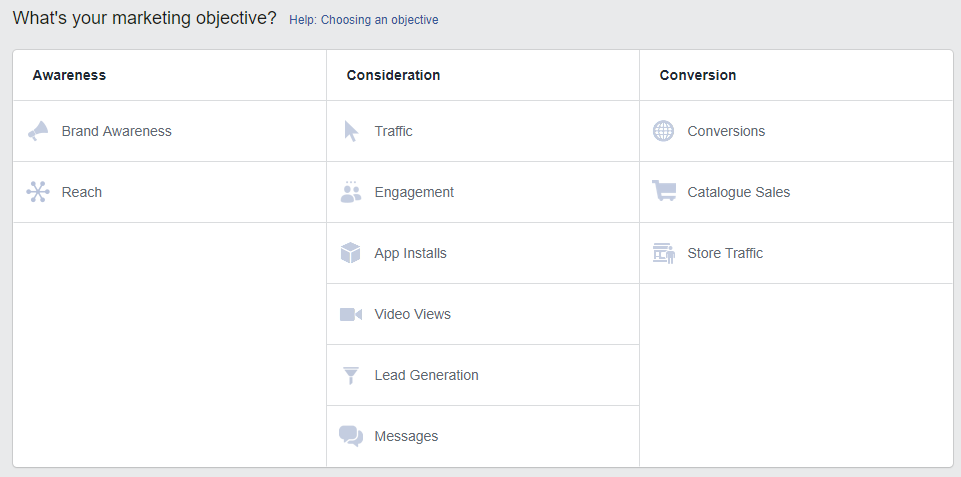
Choosing your campaign objective correctly is one of the most important steps towards ensuring good performance. It has a huge effect on:
- The ad options available to you.
- How your campaign optimises itself.
- Who your campaign shows to.
This last point is often under-estimated. If you choose to run a Conversions campaign, your ads will show to people who have historically converted after seeing Facebook ads. Not everyone is responsive to Facebook ads though, and so if you choose awareness objectives like Brand Awareness or Reach, you'll mostly be reaching people who don't usually convert after seeing Facebook Ads. Running ads to these audiences will be significantly (up to 10x) cheaper, but you're likely to see much worse results.
Our advice here is to simply choose the campaign objective which most closely matches what you want to achieve. If you're reading this article because you want to get people to download your app, then choose App Installs. If you want people to sign up for a service on your site, use Conversions.
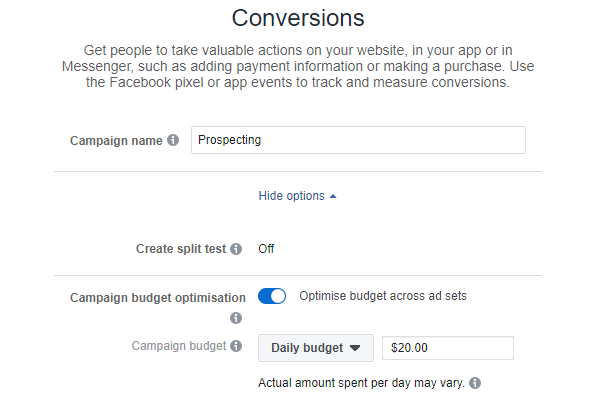
For the purpose of this article, we're going to look specifically at Conversion campaigns, as these are the most popular within Facebook Ads. We're going to call our campaign 'Prospecting', and enable 'Campaign Budget Optimisation':
If you haven't already set up your ad account, you'll be asked to fill in a few quick details after confirming your campaign.
Creating the first ad set#
Once your campaign has been created, you'll be taken to the ad set creation screen, which will look something like this.
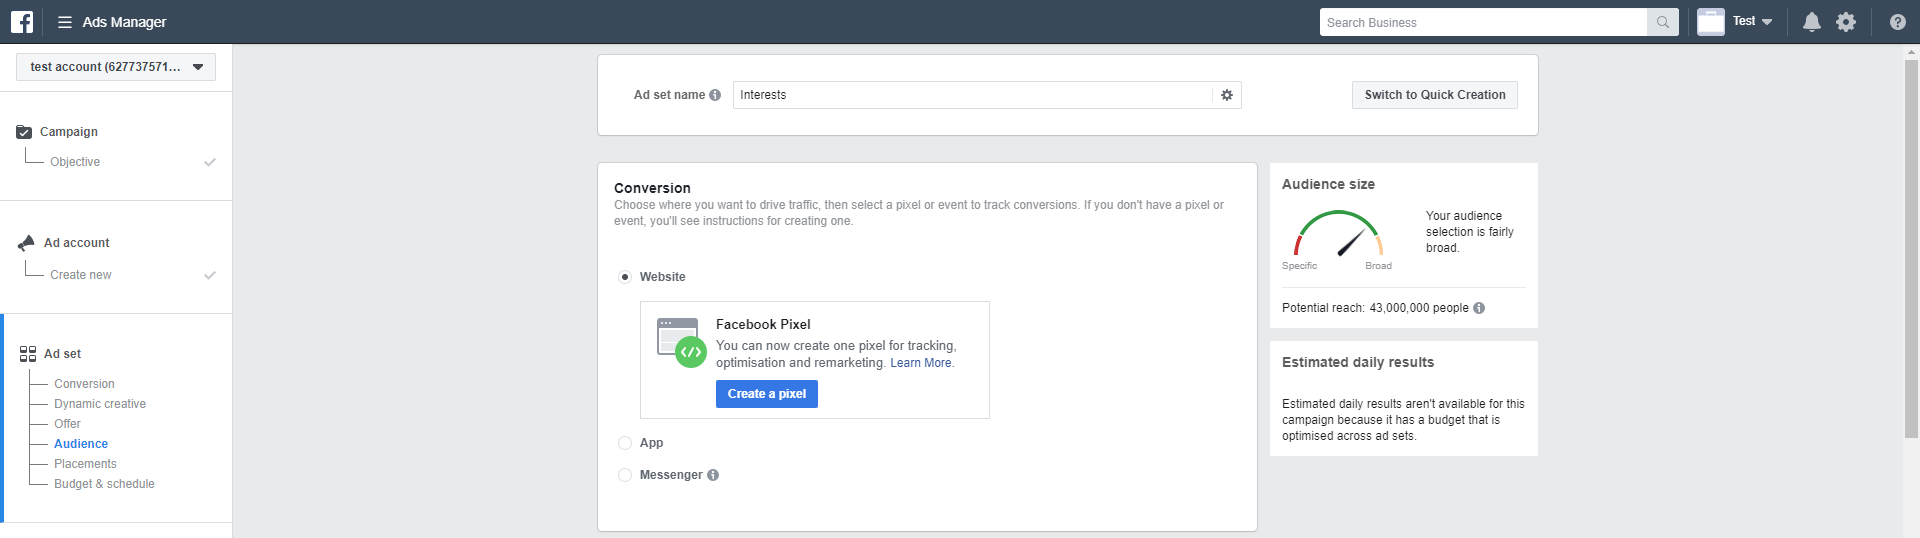
Now an ad set is a bit more complex than a campaign. While your campaign just defines your budget and what you want to achieve with your ads, your ad sets define:
- What event you're going to be optimising towards.
- Which audiences you're going to show to.
- Where your ads are going to show.
In this section, we're going to go through each of these in turn and look at the options you have available.
Choosing your conversion#
At the top of the page you should see a box that looks like this:
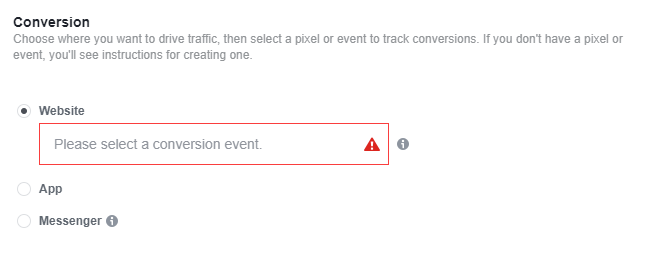
This is where you select the main event that you want to track and optimise towards. If you're an eCommerce store, for example, this will likely be completing a purchase.
If you click on the red box, you'll see a list of all the events that you've set up:
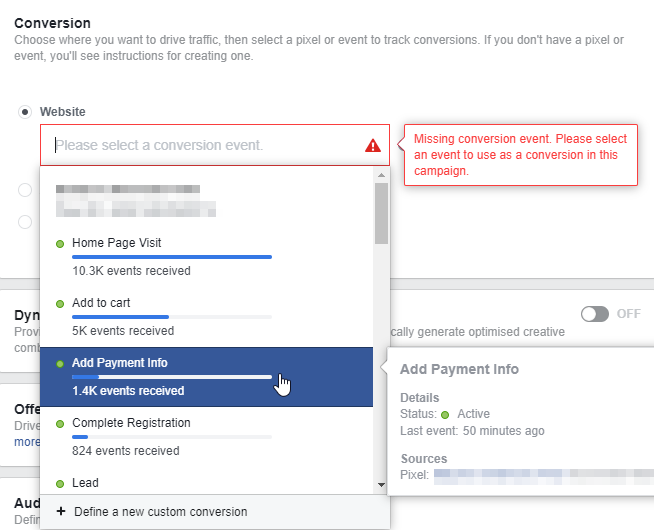
If you can't see any events, or if they all have red icons next to them, this likely means you haven't set any events up yet. In this case, I'd recommend taking a look at our guide to pixel tracking before continuing on.
If you can see the event you want to optimise towards and it has a green light, select it.
If it has a grey light, this typically means that your event is set up but it hasn't received much traffic recently. This is to be expected if you haven't launched your site yet, so feel free to select it anyway.
Defining your audience#
If you scroll down a little, you'll see a box titled 'Audience'. This is where you can customise exactly who your ads are shown to.
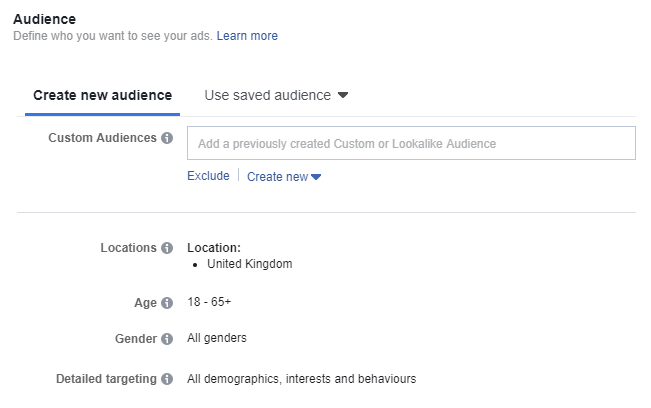
To start with, we're just going to look at a few of the options you have available:
- Locations. You'll want to change this to whatever's appropriate for your business. If you're running an eCommerce business, change this to all the locations that you ship to. If you're a fully online service-based business, with no geo restrictions, set it to all the countries or continents you think you can win clients in. Whatever happens though, avoid the need to go more specific than you have to. Some advertisers think that precisely geo-targeted ads are always the way to go, but in reality they'll interfere with Facebook's ability to learn about your customers.
- Age & Gender. Leave these as broad as possible: don't be tempted to restrict this unless your product is genuinely unsuitable for a specific age or gender. If you're selling women's swimwear, restrict your targeting to just women. Otherwise, leave it to Facebook to figure out who to show ads to.
- Detailed Targeting. This is the fun stuff. This is where you get to flick through all the bizarrely specific behaviours and interests that Facebook keeps track of. Make a note of which detailed targeting options are most relevant for your brand, and choose either one large one, or a couple of smaller, more specific ones. For example, if you were running ads for a dog groomer, you could either target dog owners as a whole, or people interested in specific types of dogs that need regular grooming.
Placements#
Facebook Ads lets you advertise across Instagram, Messenger, 3rd party apps, in addition to a range of different options just within Facebook. All of these different places to advertise are called placements, and can be found below the audience section:
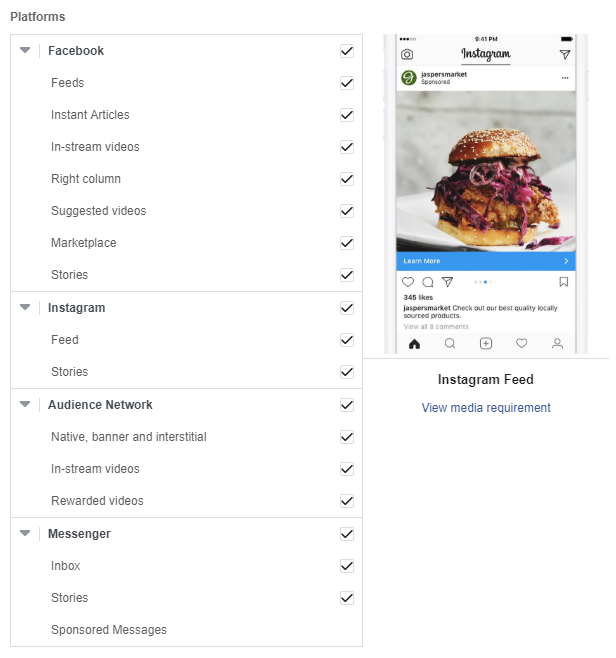
Facebook will typically push you towards enabling all placements, what it refers to as Automatic Placements. It does this so it can learn which placements work best for you, and divert your spend to those.
If you have a decent budget to play with, around 4 figures a month and up, then this can be a good move. If you're looking to start with something much smaller though, then it can be best to just focus on Facebook and Instagram feed placements. These are the ads that you'll see when you scroll through your news feed on each platform. They often work best from an acquisition perspective, as they allow you to tap into lots of high-intent users.
Optimisation#
Once you've chosen your placements, there's only one step left until your ad set is finished: choosing your optimisation event. If you've chosen to create a conversion campaign, then by default this will be set to conversions. This corresponds to the pixel event you've selected at the top of the page:
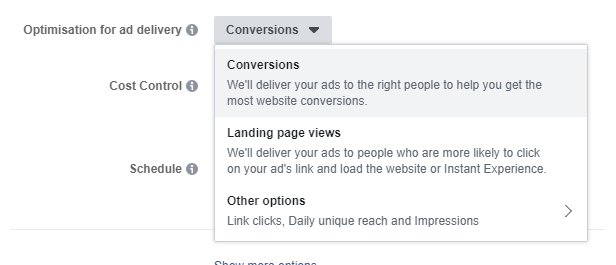
Facebook recommend always optimising to an event that you expect to happen at least 20 times per week, per ad set. This minimum volume is to allow Facebook enough data to learn how to optimise your ads.
Let's say you're an eCommerce store for example, and you expect to be able to spend $250 per week on ads, and that each sale will cost you $10 in ads. This means you expect 25 sales per week from ads. As 25 is above the limit of 20, you're fine to optimise for conversions, where your conversion is a sale.
If you're in a business where your final conversion is much harder to come by (maybe you're selling something really expensive) then it's likely you won't be able to bring in 20 per week for each ad set. In this case it's recommended to select landing page views from the list above, which will optimise for people who click your ad and land on your site.
Because landing page views are much easier to come by, Facebook will have significantly more data to learn from, and to optimise your ads with. Though landing page views aren't worth as much as conversions, they behave as a good proxy for conversions. If someone is likely to click through your ad and come to your landing page, they're also likely to explore your site and possibly convert.
To finish#
Once you're happy with the options you've selected above, you can scroll down to the bottom and click 'Continue'. At this point you'll be taken to a screen where you can create your first ad.